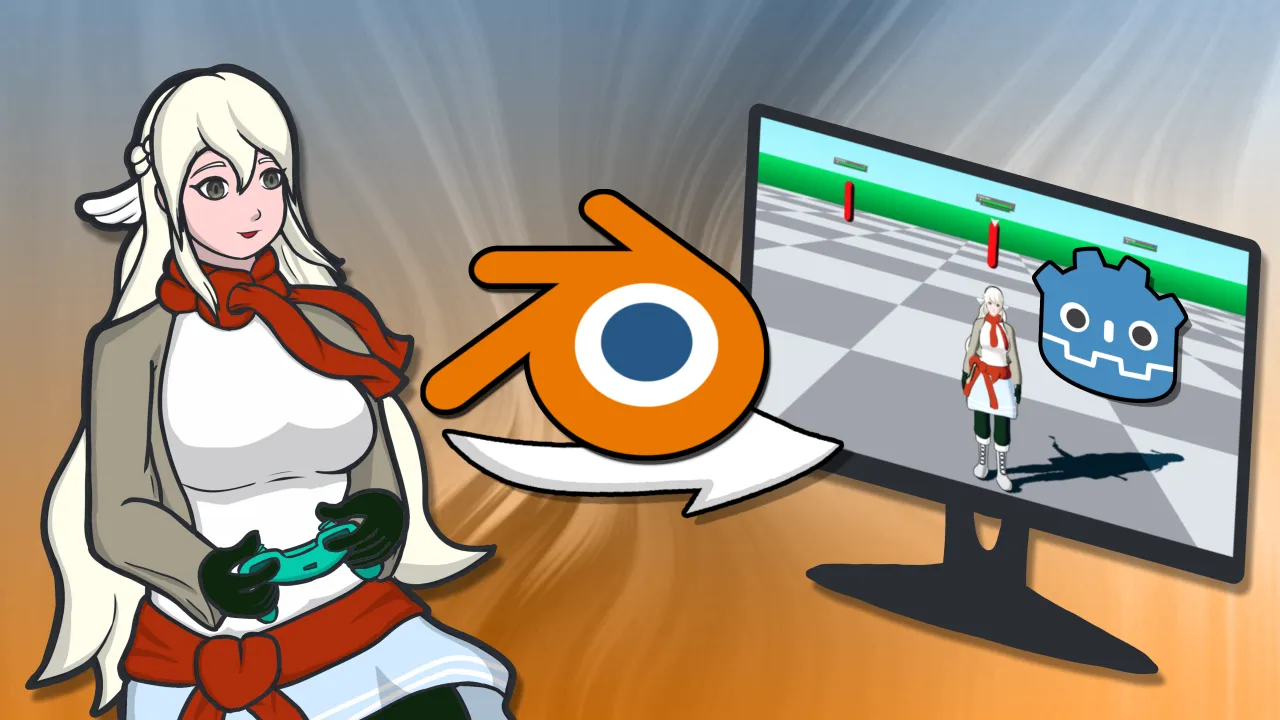
How to Make a Bow Attack Animation in Blender and Godot
Swords and guns are pretty commonly implemented in video games, but what about bows? Let's tackle that in this guide.
I’m still working on getting images up on this guide, so stay tuned!
Summary
- We will discuss the components necessary to make a bow and arrow animation in Godot as well as Blender
- We will create a bow in Blender with a rig that allows it to bend
- We will create an arrow 3D model that will serve as the projectile
- We will set up the bow’s animation states for use in the complete animation
- We will create a simple character animation for using the bow
- We will set up the system that will coordinate the character animation with the bow animation and the projectile firing
- We will attach the bow and the arrow to the character rig using Godot’s BoneAttachment3D node
Intro
A vast majority of video games feature combat as their primary game mechanic. While swords and guns are typically the stars of the show, we cannot forget the other weapon options that may be presented to us.
Such as the bow and arrow.
In many fantasy inspired stories, the bow provides a ranged counterpart to the sword. Getting close and personal can be exhilarating, but not all characters are built to withstand the brunt of combat. The bow serves to give these characters a fighting chance, so they can stow away safely in the shadows or support their team from behind. Bows may be simple in design, but they’re sleek and elegant, and require devotion and great care to master.
But how do we go about implementing bows in video games? Swords and guns are tried and true - you’ll see many tutorials on FPS or sword based combat games. Like the real world counterpart though, implementing a bow in your engine of choice requires coordination between the bow, the arrow and the character choosing to wield it.
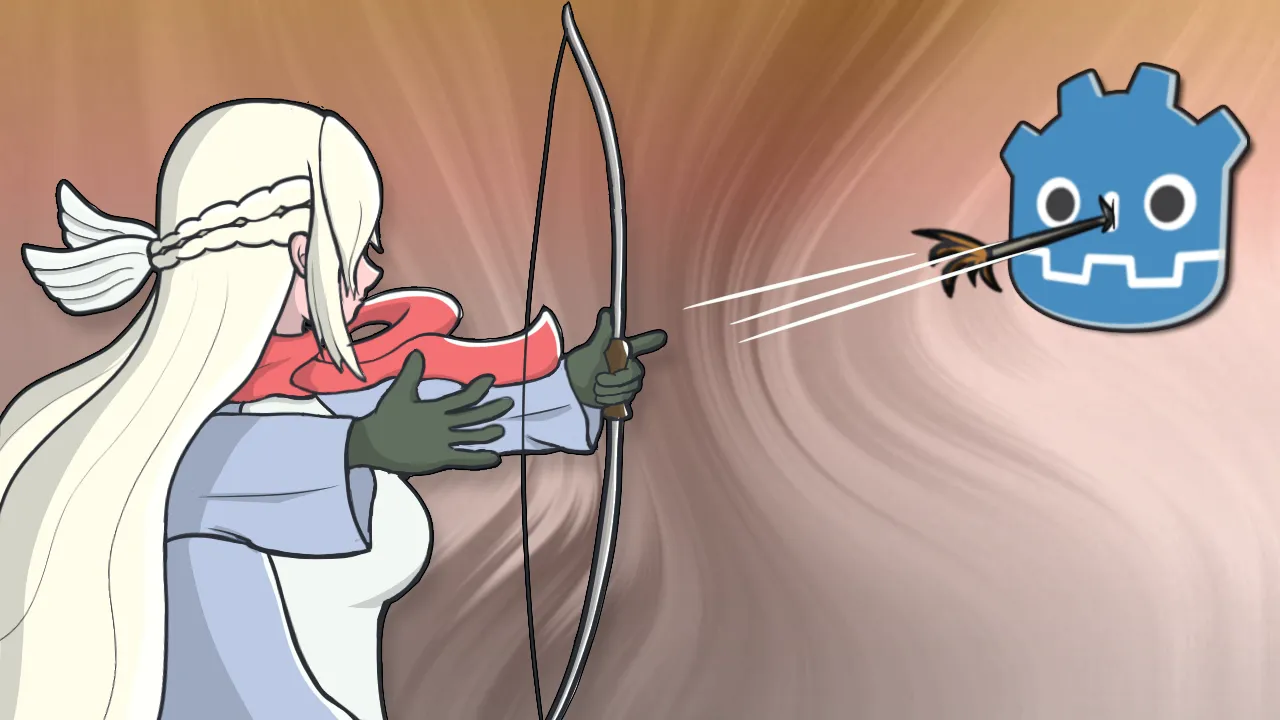
For my game, Arra World, which is a hybrid turn-based RPG, I wanted to add the bow as a usable weapon for my characters. However, the bow is most associated with my angelic archer, Kaila, as her main weapon of choice. She’s primarily a healer, but with a somewhat pent-up frustrated side of her personality, she requires something a bit more direct than a staff. Plus, the ranged weapon makes it easier to do her job as a healer as she can both attack and support from a distance.
In this video, I’ll go through the problem solving process for implementing the bow in my game. Godot is my engine of choice here, but there’s also a lot of Blender and conceptual design here, so I hope you can still get some value even if you’re not a Godot user.
This is what the final result would look like. I know the result doesn’t look amazing, and that’s mostly because I’m not an experienced animator. However, I hope that the problem solving process here is at least helpful to see for your own games.
Without further ado, let’s ready our arrows and fly right into this!
The Problem We’re Solving
To solve this problem, that is, implementing the bow attack into my game, we have to break down the problem into different parts.
First, there’s the challenge of putting the assets together. I’ll be using my existing character rig, so that’s not a problem, but we have to figure out how to also rig the bow. Swords, for example, don’t really need a rig because they don’t bend, unless you’re making some kind of super whip sword, or something. However, the bow needs to flex when it’s pulled and released, so we have to account for that somehow.
Second, we have to integrate the bow’s animation states alongside the character when she animates. Ideally, the bow should bend when the character pulls the string back, but some limitations may lead us to finding a workaround.
Finally, we have to account for flexibility in the bow attack system. Traditionally speaking, characters that wield bows would include the bow directly into the character’s model, and the bow would be animated directly by the character. The bow would be hidden in most states, but when the character plans to fire the bow, the game can just reveal the bow. However, the way I designed combat and character progression in Arra World requires any character to use a bow, and there’ll also be a variety of different bows to choose from. We don’t want the character to visually be using the same type of bow if they have a different, more powerful one equipped. In short, this means the bow attack animation should be reusable across different characters and different bow models.
So, the way we can solve this problem is by modularizing everything, meaning, we can make each part separately and then combine them in the game engine. For the bow, we can solve the flexing problem by making a rig and configuring some IK bones, allowing the bow to flex when the string pulls back. Then we can craft the character animation using the bow as a guide during the animation. Then we can export the bow and the character animation and use some code to tie it altogether.
To illustrate what we’re going for, we can look at modern Fire Emblem titles as an example. Since any character can access bows unlike older titles, there’s a need to reuse the bow attack animation across varying shapes and sizes of characters.
Now there are some limitations to this approach. Complex rigs made in Blender cannot be exported with all the bone constraints to Godot (or any game engine for the matter), so we’ll come up with a workaround that still sells the look we’re going for. I’ll explain how to solve this problem once we get to that part of the video.
For now, let’s go ahead and get started with the bow model!
Making the Bow
The good thing here is that it’s really quite straightforward. However, we’ll have to pay attention to how it’s rigged to get the most out of it.
In a new Blender scene, start by grabbing a reference image online. Once you have an image saved to your computer, switch to Top Orthographic view and drag the reference file to import it. I also like to move the reference near the origin to make it easier to follow.
Next, we will start working on the base of the bow. Create a cube or use the default cube like I did here, and then add the Mirror and Subdivision Surface modifiers. In Edit Mode, shape the cube to the best of your ability. It may be helpful to turn X-Ray on, so you can grab the vertices behind the ones in front. Otherwise you may find yourself moving only the front ones.
When you’re finished with the handle, it’s a good idea to inset the face on the side before extruding the rest of the base. This way the handle can remain thicker than the extrusions.
Once you make the extrusions, clean up the geometry as you see fit. Here I shrunk the handle a bit more along with the base, and I also flattened the bow on the Z axis. You may also want to remove any edge loops you no longer need.
To make the string, add a separate cube, or duplicate a piece of the base like I do here. Scale it down to make it thin, and move it toward the origin so the Mirror modifier clips it to the center. Make sure to remove the face at the tip of the string if there is one. Make a few extrusions until the string intersects with the base. Finally, join the string to the bow mesh if you made them separately.
Rigging the Bow With the bow model done, let’s shift focus to the rig. We could make a very basic rig where we can animate all the bones ourselves, but setting up a basic IK can make it a lot easier to use down the line. If you’re not familiar, IK, or inverse kinematics is a rigging technique where the animator can move a single bone, and a chain of other bones will follow. This is commonly used for arms and legs in character rigs, but it can also be used here to pull the bow toward the string. I’ll explain how it’s done.
With your bow model, start by adding a single bone at the handle of the bow. Name this bone “base”, and this will serve as the glue to the rest of the rig.
Next, duplicate the base bone and offset it just a little to start working on the rest of the base. Make sure to name the bone with a .L or .R suffix for later, and parent it to the base bone. Extrude several more bones until you reach the tip of the base.
For the string, all you need is just one bone in the center of the string, facing backwards and parented to the base bone. Conveniently enough, Blender will make the single bone work when we apply the automatic weights later, so we don’t need any more string bones than just this one.
To create the other side, all you need to do is use the Symmetrize function, and Blender will mirror the bones as long as you have the .L or .R suffixes in the names.
Now, to weight paint the bow, parent the bow to the rig with automatic weights. For this rig, automatic weights should be sufficient, but feel free to manually adjust weights in Weight Paint mode if needed. Test the rig by entering Pose Mode, and moving the various bones around. We can move the string freely now, but notice how the base does not bend when we pull the string. That’s what the IK will be used for.
To add the IK, we’ll need to enter Edit Mode again on the rig. Extrude a bone straight back from between the last two in the base chain, and parent this bone to the base. Name this bone ik.L and also make sure to symmetrize it to the other side.
Then, in Pose mode, we’ll need to add some Bone Constraints to make the IK work. Start by selecting the bone right next to it and adding the IK constraint. Set the target bone to the ik.L or ik.R bone we just made, and change the chain length until the dotted line points to the first one in the chain. Repeat this on the other side.
On the IK bone itself, add a Limit Distance constraint. Set the string bone as the target. The default distance should be fine, but feel free to adjust it while pulling the string back to test. This constraint helps limit how much the IK bone needs to be pulled before it starts pulling toward the string.
Now you should be able to pull the string and the rest of the bow will follow!
Creating the Arrow
We can fire our bow, but there’s no point if we don’t also have an arrow to fire. We could make the arrow separately, but I like keeping the bow and the arrow together in the same model. This way, we know which arrow goes with which bow. In Godot later, we can set up our scene to use the arrow mesh from the bow pretty easily.
Start with a reference image of an arrow, which you can find pretty much anywhere on the internet. Then create a cube, and add the Mirror and Subdivision Surface modifiers like usual. Using X-Ray, select the ends of the cube to stretch it to the size of the arrow’s base. We want to use X-Ray here because if you don’t, you may accidentally just select the top two vertices and you’ll end up with an undesired result. Make sure to also shrink the cube on the Z-Axis to thin out the arrow.
To create the thicker parts of the arrow, extrude past it, then create two loop cuts at the edges. Scale the inner loops to give it thickness, then add edge creases so it doesn’t blend with the base. Edge creases are a valuable tool to prevent the subdivision surface modifier from blending hard edges, and we’ll use them on each side of the knot. This approach also works for the base of the arrowhead.
For the arrowhead itself, extrude and shape it to the reference. I like to extrude straight up before shaping the individual parts so the topology is fairly aligned. Then, add a couple more creases and scale it on the Z axis to make it sharper. If you want to add the small pointy bits like on this reference here, you can rotate the 3D view, select the face that’s created here and extrude from it. Scale it down to form the point.
Finally, for the feather, extrude out like we did for the arrowhead. Rotate the 3D view to add a loop with an edge crease near the intersection. Now, when you scale it, you’ll be able to keep the feather flat without it blending into the arrow.
Bow Animation States
We’ve modeled and rigged all the bow parts, but what about the animation?
Remember when I said there would be a limitation to using the bow’s IK for animation? [show footage of me saying that] Well, this is where we have to put together a workaround. But why won’t using the IK work, and why did we build it anyway?
In an ideal world, we would use the IK we created to attach the bow to one of the character’s hands and the string to the other. Then when the character animates, the IK would respond automatically, pulling the bow when the character moves her string hand. This is doable in Blender by using Bone Constraints to copy the location of the base and string bones to the respective hands. As a matter of fact, we will do exactly this when we animate the character shortly.
However, we can’t export Bone Constraints to Godot. Even if we could, the IK system is being overhauled in Godot 4, and there’s no real easy way to attach both the base and the string to the character’s hands while preserving the same interaction we want. Lacking bone constraints in Godot isn’t really a Godot limitation, as I wouldn’t expect Godot to support them, but we still have to get a little creative.
Instead, we’ll just manually set up the bow’s idle, drawn and fired states in Blender, and tie them together with a BlendTree in Godot. It’s not a perfect workaround because the amount the bow will be drawn will be fixed, making it inconsistent with different sizes of characters. But it’s a decent enough solution for my game right now, and the player would hardly be able to tell given the camera angle I’ve been using. Since we went out of our way to make the IK though, it’s going to be much easier to set these up.
To start making the animation states, open up the Action Editor panel by selecting the Dope Sheet and then the Action Editor. We’ll add an action called default or “idle”, which will simply be the rest position of the bow. In Pose Mode, select all the bones and press I to insert a keyframe at frame 0.
Next, we’ll create the drawn state in a similar way. Add a new action and call it “drawn” or “pullback”. Move the string bone in Pose Mode back enough that the bow is drawn a decent amount. Add the keyframe to frame 0 like before.
Lastly, we need the fire state. It’s true we could just use the blend tree to interpolate the drawn state back to the idle state of the bow in Godot, but it can be cool to animate a bit of flex when the bow is released. It’s pretty easy to do too.
Create a new action, and start with the drawn state as the starting frame. This can be done by going to the drawn animation, selecting all the bones and using the “Copy Pose” command. Go back into the release animation and paste the frames into frame 0.
Next, grab the idle pose in the same way, and paste it into frames 10 and 20 in the release animation. Now we can edit the flex on frame 10 so it moves past the bow a little bit. Take the string bone and move it past the origin point (you could even move it past the bow handle if you want), and then keyframe like before.
With these three states, we can program them to be used properly in Godot, but let’s first set up the character animation.
Making the Character Animation
Before starting on the character’s animation, make sure you have a character rig. I’ve already set this up on my character, but if you need help, check out my complete character guide in the description - I have a step-by-step process for getting Rigify working for your rig there.
Once your rig is ready, we’ll dive into the animation. Typically, the animation process involves gathering references, identifying major keyframes, and then positioning the rig in Pose Mode to match each keyframe. Starting out, I recommend just blocking out keyframes and not worrying about the nitty gritty details. Especially if you’re prototyping your game, the core motion matters more for getting the feel of the game, so don’t spend too much time here. I plan to deep dive into animation on my channel in the future, so I’ll talk about what more we can do then.
Before starting the animation process though, we can import the bow into the scene and use it as a reference in our animation. We’ll use Blender’s Link feature so we can use the same bow even if the source file changes. Go to File > Link, select your bow’s .blend file, then choose the Object folder and select the Armature and bow model objects. To edit the linked bow, create a Library Override by right-clicking it in the Scene Collection panel and selecting Library Override > Make > Selected & Content.
Like mentioned earlier, we’ll temporarily attach the bow to the character’s hands using Bone Constraints so we can better see what’s going on. Apply the Copy Transforms constraint on the bow’s base bone to place it in the character’s hand. We will exclude it from the final export but it is useful as a reference. For the bow string, use Copy Location to connect it to the dominant hand.
It’s also worth mentioning that instead of using a palm bone, I’ve added a weapon bone just past the palm on my character rig. This allows me to rotate the weapon bone to place the weapon more comfortably in her hands. You don’t necessarily need this, but it can help. If you want to add weapon bones, duplicate the palm bone on your character’s metarig, name it weapon.L or weapon.R, and place it where the hand would close when gripping. Turn on the Deform option before generating the rig, but make sure to not add any weight paint to the weapon bone.
Now to start on the animation, add some reference files into the Blender scene. I’ll be using screenshots of my older animation just to save time, but feel free to find something better. Drag them into Blender, scale them, and lock them to avoid accidental selection.
Our core keyframes will be the initial pose, grabbing the bow, the draw, the release, and the return pose. In Pose Mode, match the character’s controls to the references as closely as possible, then keyframe all channels. Basically, just grab the hand, shoulder, hip, leg or feet handles and move and rotate them until your character roughly matches the reference position. When you are done with the first pose, press the I key to keyframe all the channels, and then repeat this again on a different frame.
After blocking out these main poses, let’s adjust the timing of the frames. This is much easier to do if the interpolation is set to Constant as we can see the core poses without any in betweens muddying the motion. Do this by selecting all the channels in your Action Editor, right clicking and then finding the constant interpolation option. You’ll see it makes this cool stop motion effect! Once you do that, adjust keyframe positions and timing to fit your game’s feel. Once the timing feels right, switch back to Bezier interpolation using the same method as before.
You should now have a workable bow attack animation. There’s plenty more work that could be done to make it nicer, but it gets the job done. With that, we now have all the major pieces, and all that’s left is to set them up in Godot!
Configuring the Bow in Godot
Before we can set up all our pieces, though, we need to export the bow model from Blender. I have more information on exporting in the aforementioned complete character guide, but as a TLDR, you can use these settings on the screen.
Once that’s done, open up Godot and create a new Inherited Scene from the bow model. If it’s all looking good, it should have the bow and arrow meshes under an Armature, and there should be an AnimationPlayer there too.
Attach a material to the bow and the arrow so it doesn’t look like blah, then we can go ahead and set up an animation tree. I made a real simple one here by creating a BlendSpace1D between the idle and drawn states, then I added a one-shot which we could use to fire the fire animation. I’ll leave it up on the screen so you can reference it as needed. Once you’re done, hide the arrow mesh, as we don’t want it to display on the bow, but rather, we’ll use it later when instantiating arrows.
That’s all we need to do with the bow scene for now. Let’s set up the character and then we can come back here when we start coding.
Configuring the Character
We could export the character as-is, with the bow animation as part of the character’s scene. However, there’s a slightly more reusable way we can do this. By making a separate .blend file in which we can store our attack animations, we can export that and use it as an AnimationLibrary in Godot. This way all characters can use it later on, and it’ll work as long as the characters themselves share a similar rig structure.
To set up the separate .blend file, just create a new Blender file, yeet the default stuff, and then link a copy of your character’s rig. In the Link submenu, select Object, and choose to link the Armature and any relevant models under the armature, so you can see what you’re doing with your character. Don’t forget to add the Library Override too, so we can actually pose it and whatnot.
The animations should have carried over from the character as links, but to make it local to this file, go ahead and click the shield icon to make a Fake User. This prevents Blender from deleting it if there’s nothing actually referencing the animation in the scene file. Save the new blend file as something like “bow animations” or some sort of code that makes sense, then you can feel free to remove the animation from the character’s source file if you want.
Exporting the animations works a lot like the character and the bow, but we can actually save a little time and space by hiding the models from the view before exporting. Godot is able to import an armature without a mesh attached, so why export the mesh if all we need is the animations? We’ll export the character mesh separately from the character blend file anyway, so this will be just the animation library. Export it with these settings as shown.
Now in Godot, we need to do one minor tweak - click on the animation library file, go to the Import tab and choose the Animation Library option. When you reimport it, it should change the icon and now you can import these animations into any character scene.
Then all you need to do is go to your character scene’s AnimationPlayer, and then add the new library via the Manage Animations menu. It’s really simple to repeat this across your characters when you have multiple.
Coding the Bow
Now we have the scenes, but we need some code. As mentioned earlier, we’ll have to coordinate the bow’s animation states with the frame data on the character.
Just as an aside, I have completely modularized animations and stuff in my game’s core codebase. It’s a bit too complex to talk about in this video and I wanted to talk about it separately, so I’ll show you a simplified version of the bow implementation instead.
Let’s start by adding a script to the bow scene so we can add some way to control the bow’s animation states.
First thing is first, let’s use an @onready variable to grab the animation tree and the arrow references, which we’ll use later.
Then, we’ll add a pullback function like this. Basically, all I’m doing here is tying some logic to a pullback variable, which we can set between 0 and 1 to control the bow’s blend state. It makes it a bit easier to use than setting the animation tree property every time. We’ll use this in the character script in a moment.
The last thing we need on the bow is a function to play the fire one-shot animation. All that really needs to be done is to reset the pullback state to 0 and then toggle the one-shot in the animation tree. It’s a bit tough to find how to do this in the Godot docs, but basically you can set this “request” parameter to true on your one-shot like this.
The bow script’s a bit sparse because most of the coordination will happen in the character script. I’m sure there’s an opportunity to refactor here, but the main focus is the logic in this tutorial.
Coding the Character Animation
Just like the bow, let’s add another script to the character scene. The character will be responsible for firing the bow, so we’ll also have to tie the character’s frames to the bow’s in the appropriate order.
To start off the script, let’s add an @export var to reference the bow scene. We’ll attach this to the character in the test scene later.
Let’s also add some key frame indicators. We’ll plug in the start frame, the end frame and the fire frame. The start frame will be the frame in which the character starts pulling the bow, not the frame when the entire animation starts. The end frame will be the frame when the character has pulled the bow fully. The fire frame will be the frame when the arrow is released, telling the bow that it should play the fire animation.
To control the animation, we’ll also need two other variables, is_drawing to determine when the bow draw started, and the frame itself. Godot doesn’t really keep track of frames on its own, so we’ll have to use our own counter.
In addition to these, let’s add references to the AnimationPlayer as well as the handles on the character’s left and right hands. These are just BoneAttachments to the weapon bones that we made earlier, and the bow and arrow would be placed in these.
We’ll use the _physics_process function so we can increment frames as well as accept the input to fire the bow. Speaking of which, we’ll add the button press code next. We’ll create the start_draw function in a moment, but this will initiate the animation and set some variables for us to use.
Now, we have to control the bow’s pullback while the character drawing animation is playing. To do this, we’ll increment our frame counter, and we’ll set the bow’s pullback based on a ratio between the start frame and the end frame. This way, the pullback remains a value between 0 and 1 throughout the animation.
Once the end frame is reached, the character is done drawing the bow, so we may as well cap the bow’s pullback to 1. Once the fire frame is reached, we’ll then fire the arrow and reset the animation variables back to the default states.
The start_draw function will just play the bow attack animation as well as set is_drawing to true and the bow’s pullback back to 0.
The fire function calls the bow’s fire function in order to play the one-shot animation, and we’ll update this with the arrow logic once we have it.
This concludes the character’s core logic. Let’s go ahead and add some finishing touches by adding an arrow projectile.
Coding the Arrow
To spearhead the arrow’s implementation, we’ll create a really basic scene with a MeshInstance3D, then we’ll add some code to replace that MeshInstance with the mesh from the bow, if it has one.
With a new scene, add a MeshInstance3D node. Set the mesh to anything you like - it’s just a placeholder anyway. The good thing is we’ll know our code works if we’re shooting an arrow in the end, not a cube.
Add a script to the scene as well, and we’ll start by taking on the projectile logic. We’ll use this variable, is_fired to control when the arrow should start moving. We actually don’t want the arrow to start moving when it’s created, because it should sit in the character’s hands until she releases it. It’s a small detail but it’s not too hard to deal with.
Then to control the movement, add a _physics_process function, and translate the arrow on its Z axis as long as it has been fired.
To set the arrow mesh, we’ll create this function that accepts the arrow mesh from the bow as a parameter, and then copies the mesh and material data into the placeholder we made.
Lastly, let’s add the fire function to set the is_fired variable to true, but also to set top_level to true, so the arrow moves in global space instead of relative to the character’s hand, which would be its parent.
To actually use the arrow, we’ll need to add a little bit more code to the character.
At the top, add an export variable that will be the arrow scene. It’s just going to be the scene that we made earlier, which we can drag and drop as a PackedScene instead of loading it from a string path. Also add another variable to keep track of the arrow instance once we make it.
Then, we’ll instantiate the arrow inside the start_draw function. Make sure to also set the arrow mesh from the bow and attach it to the empty hand.
Lastly, call the arrow’s fire function inside the fire function here to set it in motion.
Now, we should have all the code we need to make this work. Let’s create the test scene to see it all come together, and then we’re done!
Making the Test Scene
To make the test scene, go ahead and add a camera, some lighting and a world environment node. Add the character and the bow to the scene by dragging in the scene files. I enabled Editable Children on the character so I could put the bow in the right hand. Update the export parameters on the character with the reference to the bow and the arrow scenes. This should be all we need to test the scene.
Closing Thoughts
And there you have it! You now have the basic knowledge needed to work with bows in your game. I know there’s still a lot more polish I could do here, but it’s a start. I hope you were still able to get something out of this one. Let me know in the comments if you have any questions, and I hope you have a great rest of your day!